

Dyson DC24 Instruction Manual: A Comprehensive Guide
This manual details the Dyson DC24’s operation, maintenance, and troubleshooting. It covers component identification, assembly, filter care, and compatibility with other Dyson models.
The Dyson DC24 represents a significant advancement in cleaning technology, embodying James Dyson’s commitment to solving practical problems. Released as part of Dyson’s innovative cordless vacuum lineup, the DC24 quickly gained recognition for its lightweight design and powerful suction capabilities. This model utilizes Dyson’s Core Flow technology, a novel approach to delivering HEPA-filtered air.
Designed for convenience and efficiency, the DC24 is engineered for quick and easy cleaning tasks around the home. Its compact form factor and versatile attachments make it suitable for a wide range of surfaces. Understanding its features and proper operation, as detailed in this manual, will ensure optimal performance and longevity.
Understanding Key Features
The Dyson DC24 boasts several key features that contribute to its exceptional cleaning performance. Core Flow technology efficiently delivers HEPA-filtered air, ensuring a thorough clean while capturing microscopic particles. At its heart lies the Digital Motor V9, a compact yet powerful engine designed for speed and efficiency. This motor enables strong suction without compromising the machine’s lightweight build.
Furthermore, the DC24’s design prioritizes ease of use and maneuverability. Its cordless operation and variety of attachments allow for versatile cleaning across different surfaces and areas within the home, making it a practical choice for everyday cleaning needs.
Core Flow Technology
Dyson’s Core Flow technology represents a significant advancement in air filtration and suction dynamics. This innovative system optimizes airflow, ensuring powerful suction from start to finish. Unlike traditional vacuum cleaners that can lose suction as the bin fills, Core Flow maintains consistent performance by efficiently channeling air through the cyclone assembly.
This technology effectively separates dust and dirt from the airflow, directing them into the dust bin while allowing clean, filtered air to power the vacuum. The result is a more thorough and hygienic cleaning experience, capturing even microscopic particles with ease.
Digital Motor V9 – Speed and Efficiency
The Dyson DC24 is powered by the advanced Digital Motor V9, a brushless DC motor renowned for its exceptional speed and energy efficiency. This motor spins at up to 110,000 RPM, generating powerful suction to effectively remove dirt, dust, and debris from various surfaces. Its compact size and lightweight design contribute to the overall maneuverability of the vacuum.
Furthermore, the V9 motor’s brushless construction reduces friction and wear, resulting in increased durability and a longer lifespan compared to traditional motors. This translates to reliable performance and reduced maintenance requirements for the user.
Setting Up Your Dyson DC24
Initial setup of your Dyson DC24 is straightforward. Begin by carefully unboxing all components, verifying that all listed parts are present. The quick-start guide included provides visual instructions for assembly, making it accessible even for first-time users. Ensure all connections are secure before operation;
Proper assembly is crucial for optimal performance. Attach the appropriate wand and cleaner head based on the surface you intend to clean. Familiarize yourself with the location of the dust bin and filters for easy access during maintenance.
Unboxing and Component Identification
Upon opening the box, carefully inspect all included items. You should find the Dyson DC24 main body, a wand, a cleaner head (likely a combination tool), and a quick-start guide illustrating basic assembly. Verify the presence of any additional attachments purchased separately.
Identify each component before proceeding. The quick-start guide features clear diagrams. Note the dust bin release mechanism and filter access points. Confirm the T8 screwdriver is available if disassembly for deeper cleaning or repair is anticipated. Retain the packaging for potential future use or warranty claims.
Assembling the Dyson DC24
Begin by securely attaching the wand to the main body of the DC24. Ensure it clicks firmly into place, creating a stable extension for reaching various areas. Next, connect the chosen cleaner head to the wand’s end. Again, confirm a secure lock to prevent detachment during operation.
Refer to the quick-start guide for visual assistance if needed. Proper assembly is crucial for optimal suction and performance. Incorrectly fitted components can lead to reduced cleaning efficiency or even damage. Double-check all connections before powering on the device.
Operating Instructions
To begin, locate the power button, typically positioned on the main body of the DC24. Press it once to activate the vacuum. The DC24 offers various power modes, selectable via controls on the handle or body. Adjust the power level based on the surface type – lower for delicate surfaces, higher for carpets.
Utilize the included attachments for specialized cleaning tasks. These tools easily connect to the wand, enhancing versatility. Remember to regularly check for blockages during operation to maintain optimal suction. Always switch off and unplug before addressing any issues.

Powering On and Off
The Dyson DC24 initiates operation with a single press of the power button, conveniently located on the machine’s body. A clear indicator light confirms activation. To power down, simply press the same button again; the light will extinguish, signifying the unit is off.
Ensure the machine is fully switched off before attempting any maintenance or attachment changes. Avoid abrupt disconnection during operation to prevent potential damage. Regularly check the power cord for any signs of wear or damage, prioritizing safety.
Selecting Power Modes
The Dyson DC24 typically features multiple power settings, optimized for diverse cleaning tasks. These modes, often adjustable via a slider or button, range from ‘Min’ for delicate surfaces to ‘Max’ for intense dirt removal. Utilizing the appropriate power level extends runtime and optimizes cleaning efficiency.
Consider the surface type when selecting a mode. Hard floors benefit from lower settings, while carpets and rugs require higher suction. Experimenting with modes ensures optimal performance and prevents unnecessary energy consumption, maximizing the DC24’s capabilities.
Using Different Attachments
The Dyson DC24’s versatility stems from its range of attachments, each designed for specific cleaning needs. These include a crevice tool for tight spaces, a combination tool for versatile surface cleaning, and a dusting brush for delicate items. Proper attachment selection enhances cleaning effectiveness.
Securely attach tools to the wand or directly to the machine. Ensure a firm click to prevent detachment during use. V8, V10, V11, and V15 attachments are generally compatible, offering expanded cleaning options. Regularly inspect attachments for blockages and damage to maintain optimal performance.
Maintenance and Cleaning
Regular maintenance ensures optimal performance and extends the lifespan of your Dyson DC24. Key tasks include emptying the dust bin after each use, and periodically washing it with cold water – avoid detergents. Filter maintenance is crucial; HEPA filters require regular cleaning or replacement, depending on usage.
Inspect the machine for blockages frequently. A clogged machine loses suction. Disassembly for deeper cleaning requires a T8 screwdriver. Following these steps maintains powerful suction and efficient filtration, preserving your Dyson’s cleaning capabilities.
Emptying the Dust Bin
To empty the dust bin, detach it from the Dyson DC24 by pressing the release button. Be mindful of the opening mechanism, as debris can spray out initially – point it towards the trash. Continue pressing the switch to fully release the dirt and dust. Ensure the bin is completely empty before reattaching it to the machine.
Regular emptying maximizes suction power. A full bin significantly reduces cleaning performance. This simple step is vital for maintaining optimal efficiency and preventing motor strain, ensuring your Dyson operates effectively.
Washing the Dust Bin
Periodically wash the dust bin to remove stubborn dirt and maintain hygiene. After detaching, rinse the bin thoroughly with cold water until the water runs clear. Do not use detergents or cleaning agents, as these can damage the plastic.
Ensure the bin is completely dry before reattaching it to the Dyson DC24. Reassembling a damp bin can lead to reduced suction and potential motor issues. Allow ample drying time – ideally 24 hours – to prevent any moisture-related problems.
Filter Maintenance – HEPA Filtration
The Dyson DC24 utilizes HEPA filtration to capture fine dust and allergens. Regularly check the filter for blockages and wash it as instructed – typically every few months, depending on usage. Avoid using detergents; rinse under cold water until clean.
Ensure the filter is completely dry before reinstalling. A wet filter drastically reduces suction and can damage the motor. Replacement filters are available and should be changed annually, or more frequently in dusty environments, to maintain optimal performance and air quality.
Troubleshooting Common Issues
If suction loss occurs, first check for blockages in the wand, hose, or brush head. Empty the dust bin – a full bin significantly reduces performance. Inspect the filter; a dirty filter restricts airflow.
For motor overheating, discontinue use immediately and allow it to cool. Ensure adequate ventilation. Persistent overheating may indicate a more serious internal issue requiring professional service. Addressing these issues promptly will maintain your Dyson DC24’s efficiency and prolong its lifespan.
Addressing Suction Loss
Sudden suction loss often indicates a blockage. Begin by disconnecting the wand and hose, checking for obstructions. Examine the brush head, removing any tangled hair or debris. A full dust bin drastically reduces suction; empty it regularly.
Inspect the filters – a clogged filter restricts airflow. Ensure all connections are secure and airtight. If the issue persists, a more significant blockage within the machine may require disassembly and careful inspection. Regular maintenance prevents suction loss.
Dealing with Blockages
Blockages significantly reduce suction power. First, power off and unplug the Dyson DC24. Detach the wand and hose, visually inspecting for obstructions like hair or large debris. Carefully remove any blockages – avoid sharp objects that could damage components.
Check the brush head and floor nozzle. A T8 screwdriver may be needed for disassembly. If blockages persist internally, consult the service manual for detailed instructions. Preventative maintenance, like regular filter cleaning, minimizes blockage occurrences.
Motor Overheating Issues
Overheating indicates a potential problem requiring immediate attention. If the Dyson DC24 motor overheats, power off immediately and allow it to cool completely – at least 30 minutes. Frequent overheating suggests airflow restriction, often caused by blocked filters or airways.
Inspect and clean the filters thoroughly. Check for blockages in the wand, hose, and brush head. Using high-torque attachments on lower-powered settings can reduce strain. If overheating persists, consult the service manual or contact Dyson support for professional assistance.
Compatibility Across Dyson Models
The Dyson DC24 exhibits attachment compatibility with newer Dyson models like the V8, V10, V11, and V15. While these attachments generally function without damage, utilizing high-torque or laser-equipped heads on older models, such as the V8, may increase power consumption.
This is due to the older motor working harder to drive the more demanding attachments. Ensure the DC24’s battery is adequately charged when using these accessories. Compatibility expands cleaning versatility, but mindful usage prevents strain and optimizes performance across the Dyson range.
V8, V10, V11, and V15 Attachment Compatibility
Dyson DC24 demonstrates notable accessory interchangeability with the V8, V10, V11, and V15 series. Testing confirms these attachments function effectively without causing damage to either the DC24 or the newer models. However, pairing a V8 with high-demand accessories—like V15’s high-torque or laser-equipped floor brushes—results in accelerated battery drain.
The V8’s motor works harder to power these attachments. This compatibility broadens cleaning options, but users should monitor battery life and consider charging more frequently when utilizing advanced attachments on older Dyson units;
Power Consumption with Different Attachments
The Dyson DC24’s power consumption varies significantly based on the attached tool. Standard attachments draw less power, extending runtime. However, high-torque or laser-equipped floor brushes, borrowed from newer models like the V15, substantially increase energy demand.
Using these advanced attachments on the DC24 will noticeably shorten operating time. The V9 digital motor works harder, leading to faster battery depletion. Monitoring usage and ensuring a fully charged battery before tackling larger cleaning tasks is crucial for optimal performance.
Disassembly and Repair (Advanced)
Advanced disassembly of the Dyson DC24 requires specialized tools and caution. A T8 screwdriver is essential, specifically one with a length exceeding 10 centimeters, to access internal components. Attempting repairs without proper tools risks damaging the machine and voiding any warranty.
Accessing internal parts involves carefully removing screws and connectors. Detailed service manuals are recommended for guidance. Improper handling can lead to electrical hazards or mechanical failure. This section is intended for experienced technicians only; proceed at your own risk.
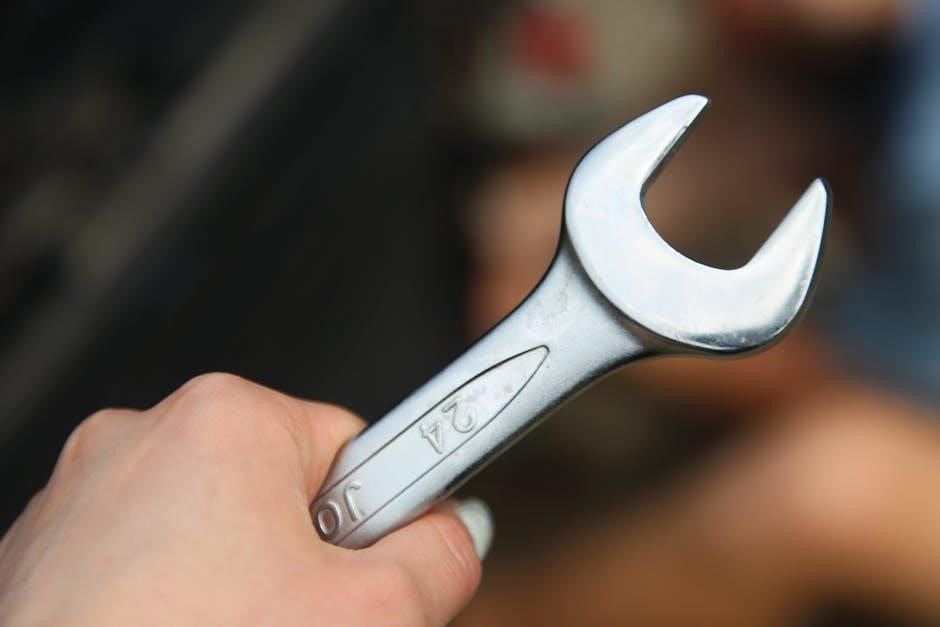
Required Tools – T8 Screwdriver
Disassembling the Dyson DC24 necessitates a specific T8 screwdriver. Standard screwdriver sets typically lack this specialized size, crucial for accessing internal components. It’s vital to acquire a T8 screwdriver with a shaft length of at least 10 centimeters to reach recessed screws effectively.

Using the correct tool prevents damage to screw heads. Attempting disassembly with an ill-fitting screwdriver can strip the screws, complicating repairs. Investing in a quality T8 screwdriver ensures a secure grip and minimizes the risk of mechanical issues during maintenance or repair procedures.
Accessing Internal Components
With the T8 screwdriver, begin by removing the screws securing the base of the Dyson DC24. Carefully detach the bottom cover, noting the location of any clips or fasteners. Be cautious as releasing the cover may cause some debris to eject, so prepare accordingly.
Once the base is removed, internal components become accessible. This includes the motor, cyclone assembly, and electronics. Exercise extreme care when handling these parts, avoiding any forceful movements that could cause damage. Document the arrangement for reassembly.
Weight and Ergonomics
The Dyson DC24’s weight significantly impacts usability, particularly during extended cleaning sessions. A heavier unit can cause fatigue, making it less convenient for comprehensive home cleaning. Consider the user’s physical capabilities when operating the device.
Ergonomic design is crucial for comfortable handling. The balance and grip of the DC24 influence maneuverability and reduce strain on the wrist and arm. A well-balanced vacuum allows for effortless navigation around furniture and tight spaces, enhancing the overall cleaning experience.
Impact of Weight on Usability
The Dyson DC24’s weight directly affects cleaning convenience and efficiency. A heavier machine demands more physical effort, potentially leading to quicker user fatigue during prolonged use. This is especially noticeable when cleaning stairs or reaching overhead areas.
Increased weight can also limit maneuverability. It becomes harder to navigate around obstacles and maintain consistent suction power. Users with limited strength or mobility may find a lighter vacuum more practical for daily cleaning tasks. Careful consideration of weight is vital for optimal usability.

Dyson’s Research and Development
Dyson invests heavily in research and development, operating engineering, manufacturing, and testing facilities globally. Locations include Singapore, the UK, Malaysia, Mexico, China, and the Philippines, fostering innovation across multiple disciplines.
Founded in 1993, Dyson’s initial operations began in a UK carriage house. This commitment to engineering excellence drives continuous improvement in technologies like Core Flow and digital motors. Dyson’s global presence allows for rapid prototyping and efficient production of advanced cleaning solutions, exemplified by the DC24’s design.
Global Engineering and Manufacturing Locations
Dyson’s expansive global footprint supports its rigorous research and development efforts. Key engineering and manufacturing hubs are strategically located in Singapore, the United Kingdom, Malaysia, Mexico, China, and the Philippines.
These facilities enable Dyson to maintain control over the entire product lifecycle, from initial concept and prototyping to large-scale production and quality assurance. This global network facilitates rapid innovation and efficient supply chains, ensuring the DC24 and other models benefit from cutting-edge technology and consistent manufacturing standards.
James Dyson’s Design Philosophy
James Dyson’s core design principle centers on solving practical, everyday problems with innovative engineering. He isn’t driven by grand, abstract challenges, but rather by identifying and tackling specific, solvable puzzles.
Dyson prioritizes functionality and user experience, eschewing unnecessary complexity. He focuses on creating products that genuinely improve people’s lives, a philosophy evident in the DC24’s design. This approach emphasizes iterative prototyping and relentless testing, ensuring each Dyson product delivers tangible benefits and lasting value to its users.
Focus on Solving Practical Problems
Dyson’s design ethos revolves around identifying and resolving tangible, everyday inconveniences. James Dyson himself states he prefers “puzzles” he can solve, rather than tackling overwhelming global issues. This pragmatic approach is central to the DC24’s development;
The DC24 isn’t about flashy features; it’s about effective cleaning. This focus translates into a machine designed for real-world messes, prioritizing powerful suction and efficient filtration. Dyson’s commitment to practical solutions ensures the DC24 addresses common cleaning challenges directly, offering a user-friendly and reliable experience.
Air Purification System
While primarily a vacuum, the Dyson DC24 incorporates an air purification system to enhance cleaning quality. This system utilizes both an activated carbon filter and an electrostatic filter working in tandem.
The activated carbon filter captures odors and allergens, while the electrostatic filter removes microscopic particles from the airflow. Although Dyson’s dedicated air purifiers employ HEPA filters, the DC24’s system still significantly improves air quality during operation. This dual-filtration approach ensures cleaner exhaust air, benefiting users with sensitivities or allergies.
Activated Carbon Filter
The Dyson DC24’s activated carbon filter plays a crucial role in odor elimination and allergen reduction during vacuuming. This filter is specifically designed to trap microscopic particles that contribute to unpleasant smells and trigger allergic reactions.
Activated carbon’s porous structure provides a large surface area for adsorption, effectively capturing volatile organic compounds (VOCs) and other airborne pollutants. Regular maintenance, including periodic replacement, is essential to maintain the filter’s effectiveness and ensure optimal air purification performance within the Dyson DC24 system.
Electrostatic Filter
Alongside the activated carbon filter, the Dyson DC24 utilizes an electrostatic filter to enhance air purification capabilities. This filter employs an electrostatic charge to attract and capture even the smallest airborne particles, including dust mites, pollen, and pet dander.
The electrostatic charge doesn’t require any power source, making it an energy-efficient component of the filtration system. Maintaining a clean electrostatic filter is vital for consistent performance; regular cleaning or replacement ensures the Dyson DC24 continues to deliver purified air alongside powerful suction, contributing to a healthier home environment.

Dyson DC24 Service Manual Information
Accessing the Dyson DC24 service manual provides detailed insights for advanced users and technicians. These manuals, often available online through Dyson’s support channels or third-party resources, contain comprehensive diagrams and step-by-step instructions for disassembly, repair, and component replacement.
Service manual topics typically include troubleshooting flowcharts, parts lists with exploded views, and electrical schematics. Understanding these resources is crucial for diagnosing complex issues beyond basic maintenance, enabling efficient repairs and extending the lifespan of your Dyson DC24 vacuum cleaner.
Accessing Service Manuals
Locating the Dyson DC24 service manual can be achieved through several avenues. Dyson’s official website often hosts downloadable manuals for registered owners, providing a direct source for technical documentation. Alternatively, numerous online repositories and forums dedicated to appliance repair frequently archive these manuals.
Searching using specific model numbers (DC24) and keywords like “service manual” or “repair guide” yields relevant results. Be cautious when downloading from unofficial sources, ensuring the file is legitimate and free from malware. These manuals are invaluable for detailed repairs.
Understanding Service Manual Topics
Dyson DC24 service manuals comprehensively detail the vacuum’s internal workings. Expect exploded diagrams illustrating component placement, aiding disassembly and reassembly. Electrical schematics outline wiring configurations for troubleshooting power issues. Diagnostic flowcharts guide technicians through identifying and resolving common malfunctions, like suction loss or motor overheating.
Furthermore, manuals specify torque settings for screws (often requiring a T8 screwdriver) and provide parts lists with corresponding part numbers. They also detail calibration procedures and safety precautions essential for performing repairs correctly and safely.
Safety Precautions
Always disconnect the Dyson DC24 from power before any maintenance or troubleshooting. Never operate the vacuum with a damaged cord or plug. Avoid using it near flammable liquids or gases. Do not insert objects into openings, as this could cause electric shock or damage.
Ensure the dust bin is properly installed before use to prevent debris from escaping. Avoid pulling the cord; instead, grasp the plug. Regularly inspect the machine for any signs of wear or damage, and discontinue use if issues arise.
General Safety Guidelines

Prioritize safety when operating your Dyson DC24. This device is intended for dry vacuuming of indoor surfaces only. Never use it outdoors or on wet surfaces. Keep children and pets away during operation. Avoid vacuuming sharp objects that could damage the machine.
Always use caution when vacuuming stairs. Ensure the unit is stable and secure. Do not attempt to modify the Dyson DC24 in any way, as this could compromise its safety features. Regularly check for blockages and address them promptly.
Avoiding Damage to the Machine

Protect your Dyson DC24 from potential damage. Never vacuum liquids, as this can cause motor failure and void the warranty. Avoid vacuuming large or bulky items that could strain the motor or clog the airways. Regularly inspect the brush bar for hair and debris, removing any obstructions promptly.
Do not force the machine over rough surfaces. Use the appropriate attachments for different cleaning tasks. Ensure the dust bin is emptied frequently to maintain optimal suction power and prevent overheating. Store the Dyson DC24 in a dry, safe location.